
Introduction
You may want to show or hide certain lenses based on the prescription values your customer enters. For example, if a customer enters an SPH value of -4.00, you may want to hide a lower-index lens that is not suitable for that value.
Example Use Case
Let's say you have two lenses, and you'd like to show or hide them based on the following parameters:
| Lens Name | Price | SPH | CYL |
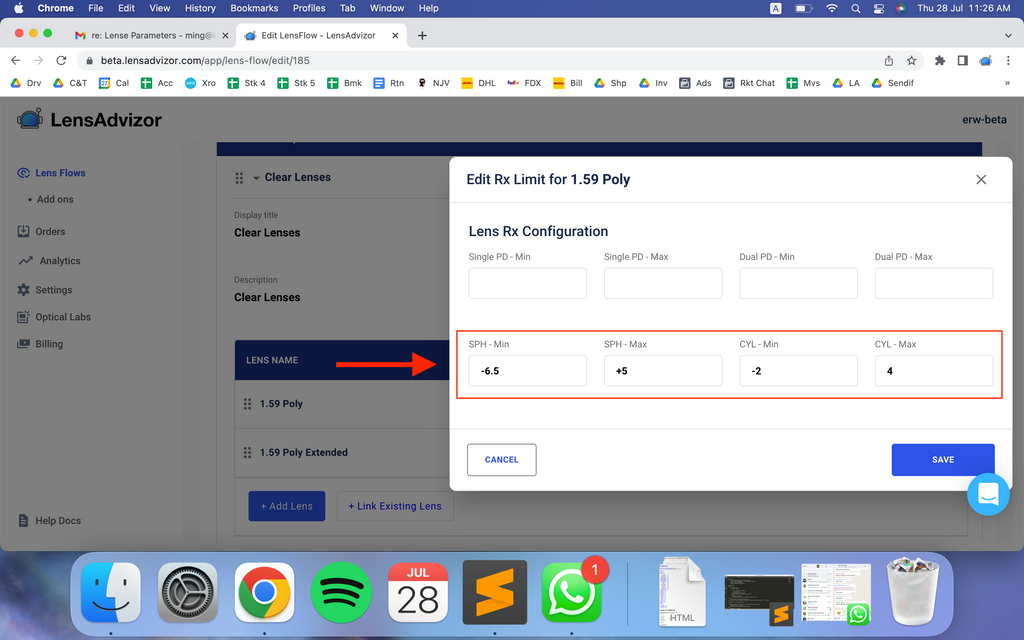
| 1.59 Poly | $50 | +5.00 to -6.50 | less than -2.00 |
| 1.59 Poly Extended | $105 | +4.00 to -5.00 | -2.25 to -4.00 |
Here's how you do it (step by step)
1. Create a lens flow. In this example, we called ours "Rx Limits Example."

2. Add a prescription type. In this example, we added Single Vision.

3. Add a lens group. In this example, we added one called "Clear Lenses."

4. Within the Clear Lenses lens group, add your first lens, 1.59 Poly.

5. Save 1.59 Poly.
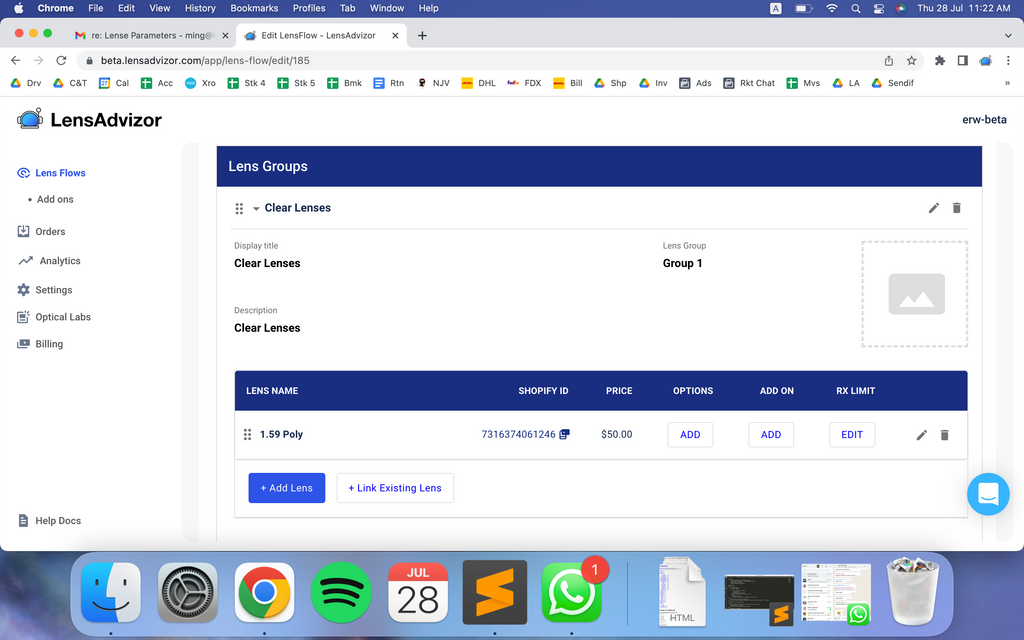
6. Add a second lens, "1.59 Poly Extended."

7. Save 1.59 Poly Extended.

7. On the 1.59 Poly row, click the EDIT button under RX Limit and and enter you minimum and maximum SPH and CYL values.

8. Repeat the process for 1.59 Poly Extended with its lens parameters.

9. That's it! Now it's time to test your prescription limits. Assign a product to your lens flow and click the product link.

10. On the product page, click the Select Lenses button, followed by "Single Vision" and "Enter Your Prescription Manually."

11. According to the limits we set up, entering -2.00 for CYL should only let us see 1.59 Poly on the next page.

12. And that's what we see!

13. And if we enter -2.25 for CYL, only 1.59 Poly Extended should appear.

13. And that's what happens!

Conclusion
If you want to limit what lenses your customers see based on the prescription they enter, prescription limits are your answer. I hope you found this helpful!
If you have any questions, don't hesitate to reach out to us at help@lensadvizor.com.